
Even an efficient washer and dryer can’t prevent wash day from dragging when the laundry room works against you. I often find that the biggest delays come from the small interruptions surrounding each load. You might have to sort a mixed pile, hunt down a missing supply, or clear a surface before you can continue. Those repeated interruptions can turn a straightforward chore into a stop-and-start process.
Your setup should follow the way laundry naturally moves through the room. Clothing, supplies, and completed loads all need dependable places at every stage. Defined storage and work areas reduce unnecessary movement while preventing one task from interfering with another. Once the room supports a steady workflow, you can finish loads with fewer pauses and less effort.
You can create a smoother laundry room workflow with practical changes that address common sources of delay:
- Sort dirty clothes before wash day
- Create a landing zone for laundry baskets
- Keep everyday supplies near the washer
- Set up a dedicated stain-treatment station
- Add a clear surface for folding
- Install a rod for hanging clothes
- Make room for air-drying
- Assign baskets to family members
- Store small tools where you use them
- Give stray items a temporary home
The sections ahead explain how these adjustments can streamline specific parts of the process. You can then choose the ideas that best address the slowdowns in your current setup.
Sort Dirty Clothes Before Wash Day
Wash day moves faster when clothes are already separated before you start the first load. A single hamper forces you to sort through everything while the washer sits empty. Mixed piles can also make it harder to judge which load is ready to run. Divided hampers give you an immediate view of what has accumulated and what can wait.
Your sorting categories should reflect the loads you wash most often. Lights, darks, towels, and delicate garments are useful starting points, but you don’t need a separate compartment for every fabric type. Too many categories can take up valuable space and make the system harder to follow. Choose a few divisions that match your regular routine and the capacity of your washer.
Place the hampers where dirty clothing naturally enters the laundry room so you aren’t carrying items back and forth. Clear labels can help everyone in your household use the same compartments consistently. Once one section holds enough for a full load, you can move its contents directly to the washer. Pre-sorting removes an entire step from wash day and helps you start the next load without hesitation.
Create a Landing Zone for Laundry Baskets
Laundry baskets can quickly take over the floor, countertop, or top of the machines when they don’t have a designated place. Their placement may then interfere with loading, folding, or walking through the room. One detail I always account for is how quickly an unassigned basket ends up in the main work area. A dedicated landing zone keeps baskets accessible without letting them interrupt another task.
The right location depends on the room’s size and the direction laundry usually travels. Open shelving, a low cubby, or a clear section beneath a counter can provide a convenient place to park baskets. Make sure the opening is large enough to slide a full basket in and out without tilting it. Your chosen spot should also sit close to the washer or folding area so you don’t add unnecessary steps.
Use the landing zone for baskets waiting to be filled, emptied, or carried out of the laundry room. Avoid treating the space as general storage, since unrelated items can make it unavailable when you need it. Returning empty baskets to the same location also prevents you from searching through bedrooms or hallways before the next load. With the walking and work areas clear, you can move laundry through the room more comfortably.
Keep Everyday Supplies Near the Washer
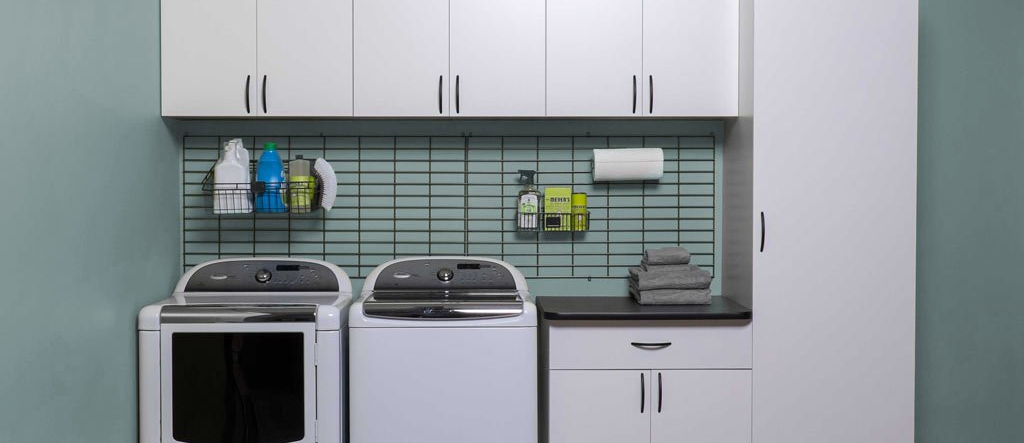
Your most-used laundry products should be easy to reach as soon as you’re ready to start a load. Detergent stored across the room adds extra movement and makes it easier to leave containers on the counter afterward. Frequently opening several cabinets also slows down a task you repeat throughout the wash day. A nearby shelf or cabinet keeps the essentials available without crowding the top of the washer.
Choose a storage area that you can reach comfortably while standing near the machine. Detergent, fabric softener, and dryer sheets usually deserve the most accessible spots because you use them regularly. Keep the labels visible so you can identify products quickly and notice when supplies are running low. If you have children or pets, place potentially harmful products in secure storage and follow the manufacturer’s safety directions.
Bulk containers and unopened refills don’t need to occupy this prime storage space. Move them to a higher shelf or secondary cabinet until the current product is nearly empty. Limiting the nearby area to everyday supplies makes it easier to find what you need and return it after use. Your washer station will stay orderly, and the next load can begin without a search for detergent.
Set Up a Dedicated Stain-Treatment Station
Stains are easier to address when the right products are gathered in one predictable spot. If stain remover is buried behind bulk supplies, you may postpone treatment and forget which garment needs attention. A small tray, shallow drawer, or pull-out shelf can hold what you use without consuming much room. Position the station near a sink or work surface so you have space to inspect and treat the fabric.
My preference is to keep the station limited to a few products that handle the stains you encounter most often. Include your usual stain remover, a soft brush, and a clean white cloth if those items suit your routine. Keep product labels visible so you can check application instructions and fabric restrictions quickly. A compact setup is easier to maintain and prevents rarely used bottles from crowding the area.
Give treated garments a designated place to wait before washing. A small bin or washable tray keeps them separate from untreated clothing and reminds you to check them before starting the load. Always review the care label and follow the stain remover’s directions to avoid damaging the material. With the full treatment process contained in one area, you can respond to stains without searching the laundry room for supplies.
Add a Clear Surface for Folding
Freshly dried clothes are more likely to be folded promptly when an open work surface is waiting nearby. Without one, clean laundry often lands on a bed, sofa, or the top of the machines. Moving the load to another room adds a step and creates another opportunity for it to sit unfinished. A dedicated folding area lets you handle garments as soon as they leave the dryer.
Place the surface close enough to the dryer that you can transfer clothing without carrying a heavy basket across the room. The counter should provide enough room to spread out one garment while keeping the rest of the load contained. A comfortable working height will also make repeated folding easier on your back and shoulders. If space is limited, a compact counter above front-loading machines can make use of an area that might otherwise sit empty.
Protect the folding area from becoming storage for detergent, mail, and unrelated household items. Nearby cabinets or drawers can give those belongings a permanent location while leaving the counter available for laundry. Once you finish folding, place the stacks into their assigned baskets so the surface is ready for the next load. Keeping this workspace open helps clean clothes leave the laundry room sooner.
Install a Rod for Hanging Clothes
Wrinkle-prone garments benefit from going onto hangers as soon as the dryer stops. Shirts, dresses, and work clothes can crease quickly when they remain in a basket beneath heavier items. A hanging rod gives you a place to handle these pieces before moving on to the rest of the load. You may spend less time ironing or returning clothing to the dryer to release wrinkles.
Mount the rod close to the dryer or folding surface so it fits naturally into your routine. Leave enough clearance below it for longer garments to hang without brushing the counter or appliances. The rod should also sit at a comfortable height that doesn’t require you to stretch repeatedly. If your laundry room is narrow, a shorter rod beneath an upper cabinet may provide enough capacity without obstructing the walkway.
Keep a modest supply of empty hangers beside the rod so they’re ready when you open the dryer. Too many hangers can crowd the space and make finished garments harder to remove. Once the load is complete, carry the hanging clothes directly to their closets and return the extras to the rod. This simple handoff keeps clothing moving while the next load dries.
Make Room for Air-Drying
Some garments need to dry naturally because heat can affect their shape, size, or fabric. Without a designated spot, damp clothing may end up draped over doors, chairs, or shower rods. Those temporary locations can block access and scatter unfinished laundry around your home. A dedicated air-drying area keeps delicate items within the laundry room and makes their status easy to track.
Wall-mounted racks and retractable lines can provide drying space without permanently occupying the walkway. Open shelving may also work for sweaters and other garments that need to dry flat. Choose a location with adequate airflow and enough clearance to prevent damp fabric from touching walls or cabinets. If items tend to drip, place them above a sink or another moisture-resistant surface that’s easy to wipe down.
Foldaway features are especially useful when you only air-dry a few items per week. Ask me which laundry room feature gets overlooked most often, and air-drying space would be near the top of the list. Giving these garments a defined place also prevents them from becoming mixed with dry clothes waiting to be put away. Once the items are ready, you can clear the rack and fold it back until the next load.
Assign Baskets to Family Members
Clean laundry can stall in the laundry room when several wardrobes are mixed in the same basket. You may need to sort the entire load again before anything can be put away. Giving each family member a designated basket lets you separate finished garments as you fold. The filled baskets can then travel directly to the correct bedrooms.
Names, colors, or simple labels can make each basket easy to identify at a glance. Choose baskets that fit the shelves or landing zone without creating an obstacle on the floor. Stackable designs may help you conserve space, but they should remain easy to lift when full. Keeping the basket sizes consistent also gives the room a more orderly appearance.
Set a routine for removing full baskets so clean clothes don’t accumulate between wash days. You might carry them out after every load or ask family members to collect their own at a set time. Return the empty baskets to their assigned places once the clothing has been put away. A predictable handoff keeps finished laundry moving and leaves the room ready for the next batch.
Store Small Tools Where You Use Them
Small laundry tools are easy to misplace when they share storage with unrelated supplies. Mesh wash bags, clothespins, lint rollers, and garment brushes may end up scattered across several cabinets. You then have to pause the task and search when one of them is needed. Keeping each item near its point of use makes the room easier to work in.
Match each category of tools to the area where you’ll use it:
Washer Accessories: Keep mesh bags and reusable measuring tools near the washer.
- Drying Supplies: Place clothespins and similar accessories beside the air-drying area.
- Garment-Care Tools: Store fabric shavers and garment brushes near the folding or ironing surface.
- Lint-Care Items: Position lint rollers and dryer-cleaning tools close to the dryer.
Avoid filling these storage areas with tools you rarely use. Extra items can hide the essentials and make the containers harder to maintain. I make a habit of returning each tool to its assigned spot as soon as I finish using it. Consistent placement saves time and prevents useful accessories from disappearing into the back of a cabinet.
Give Stray Items a Temporary Home
Coins, receipts, buttons, and other pocket contents often land on the nearest open surface. Once scattered, they create clutter and may be difficult to match with the correct garment or owner. A small catchall gives you one place to put anything you find while loading the washer. You can continue sorting without stopping to return every object immediately.
Choose a shallow container that’s easy to see and reach near the washer. Divided compartments can separate loose change, clothing pieces, and items that need prompt attention. Keep sharp or potentially hazardous objects secured until you can dispose of them or return them safely. The container should be large enough for occasional finds without taking over valuable workspace.
Review the catchall regularly so temporary storage doesn’t become permanent clutter. Return useful belongings, add loose change to its usual place, and discard anything you no longer need. Unmatched socks can have a separate small bin if they frequently accumulate in your laundry room. With stray items contained and cleared on a routine basis, your work surfaces remain available for the tasks they’re meant to support.
Conclusion
Wash day becomes easier when the laundry room supports the order in which tasks happen. Defined places for clothing, supplies, and finished loads reduce the pauses that stretch a routine longer than necessary. Less searching and repeated handling allow one load to move smoothly into the next. The chore may never be exciting, but it can fit your schedule without taking over your day.
